Windows: Projecting Screen via Display Cables
Devices which support a display connection allows you to project your laptop screen to a larger screen. Provided that you have already setup, this article demonstrates how to configure projection via Windows.
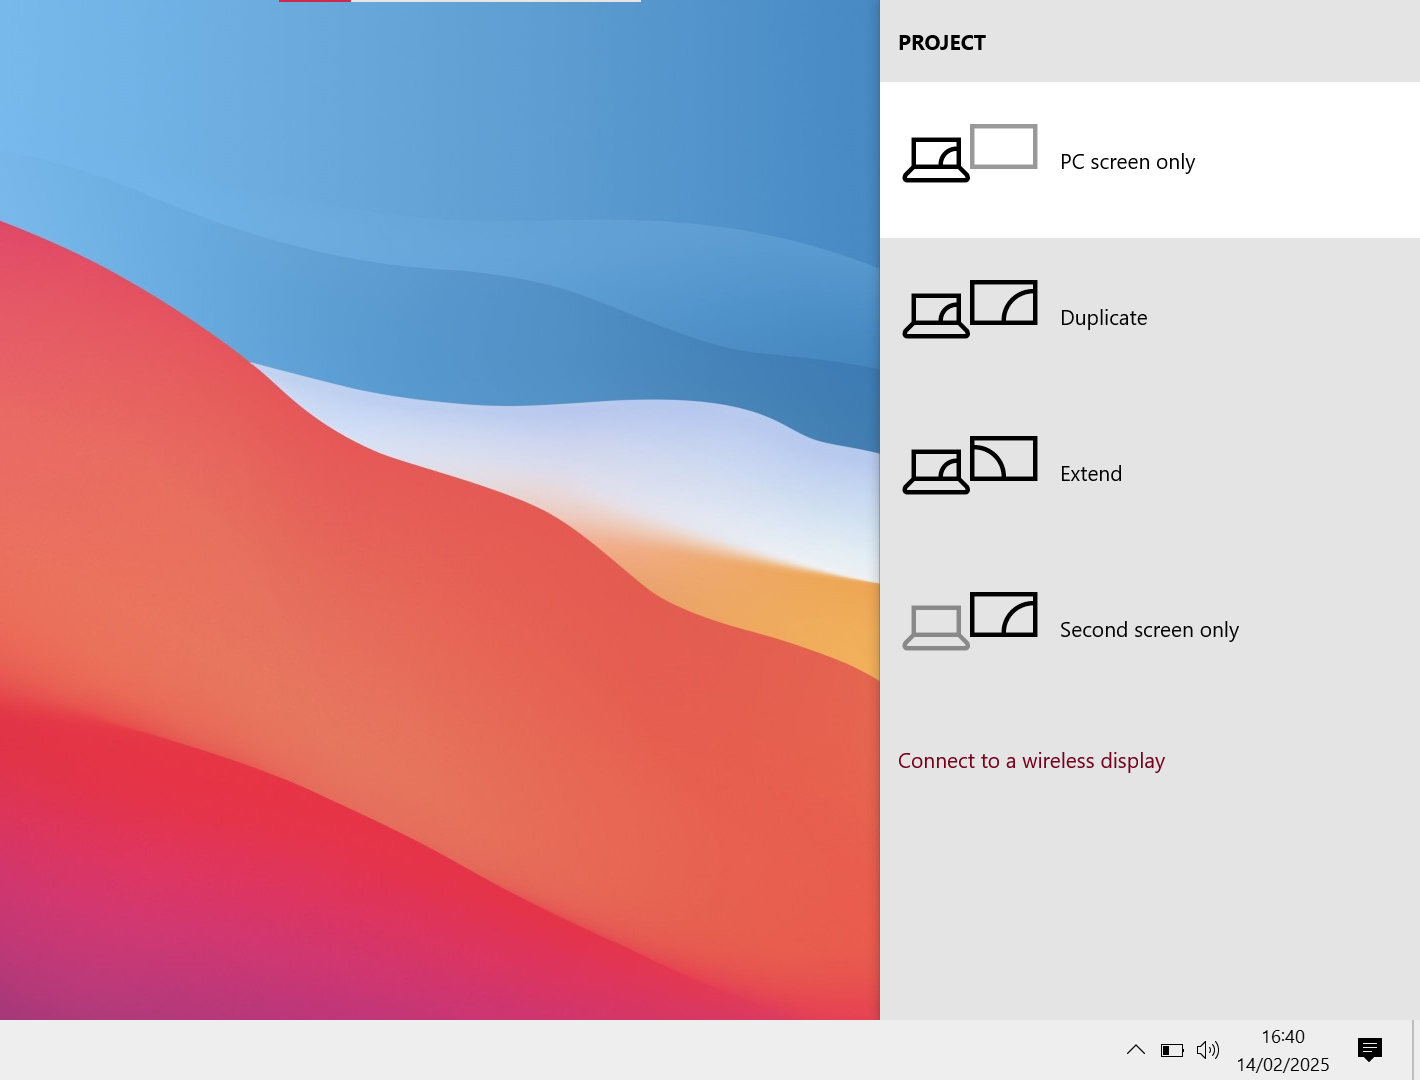
1. Adjusting Projection style
Press the Windows key + P. A series of different projecting styles should pop up.
PC screen only = This stops the projection to the Secondary screen but keeps your screen working.
Duplicate = Whatever is seen on the PC screen will exactly display on the Secondary screen.
Extend = Whatever is seen on the PC screen is kept on the PC screen. Secondary screen is an extension of the PC screen but not duplicate.
Second screen Only = This Keeps the projection to the Secondary screen but stops your screen displaying.
Depending on your needs you can adjust the style.
2. SearchDisplay for Quick AssistSettings
Type Quick Assist in the search bar, then press Enter to open it.

3. Enter the Support Code
Once the Quick Assist window appears, you’ll see a prompt asking for a code. Your IT support engineer will provide this code.
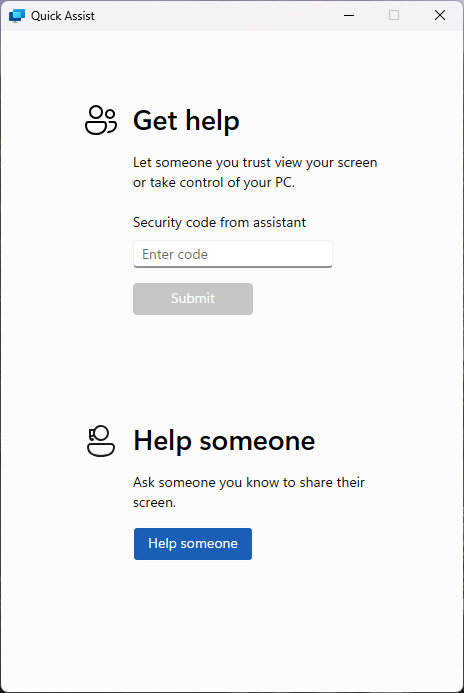
4. Submit the Code
Type in the code and click Submit to initiate the remote session.

5. Accept the Remote Session
Quick Assist will go through a brief loading screen, followed by a prompt with a checkbox. Tick the box and click Accept to confirm the remote session.
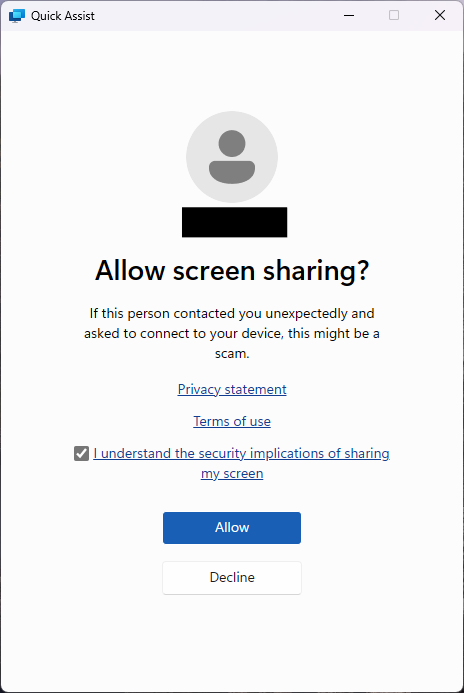
6. Grant Control to the Support Engineer
Finally, your support engineer will request control of your machine. A toolbar will appear at the top of your screen. Click Allow to grant them control.
