How to Add a Shared Mailbox (Classic Outlook)
After an admin has added you as a member of a shared mailbox, close and then restart Outlook. The shared mailbox should automatically appear in your Folder pane in Outlook.

If it didn't work?
If your admin only recently added you to a shared mailbox, it may take a few minutes before the shared mailbox appears. Wait a bit and then close and restart Outlook again.
If that didn't work, then manually add the shared mailbox to Outlook:
1. Open Outlook.
2. Select the File tab on the ribbon, then select Account Settings > Account Settings.
3. Select the Email tab.
4. Make sure the correct account is highlighted, then choose Change.
5. Choose More Settings > Advanced > Add.
6. Type the shared email address, such as info@contoso.com.
7. Choose OK > OK.
8. Choose Next > Finish > Close.
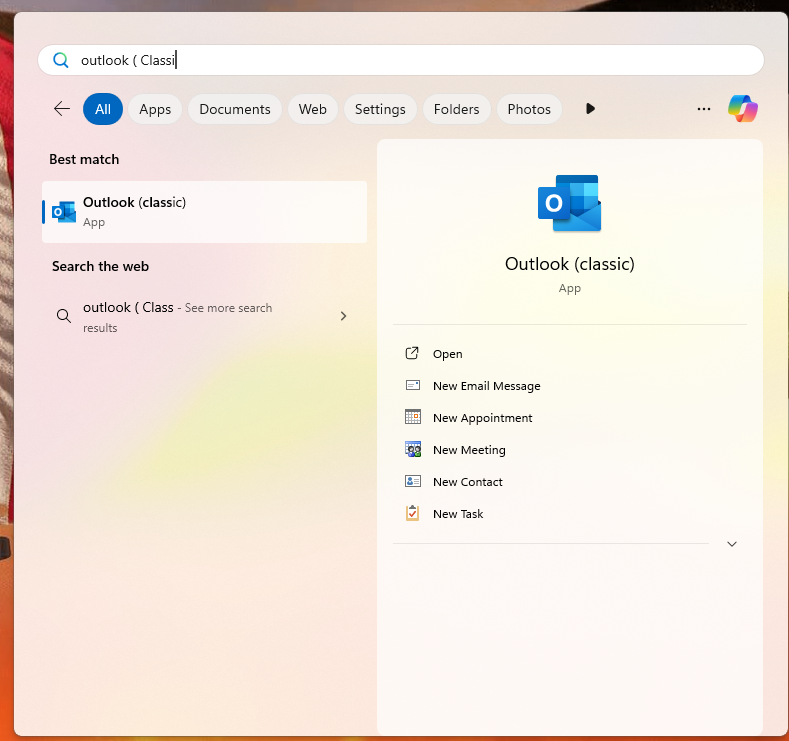
1. Open Outlook app (Classic)
Press the Windows key on your keyboard to bring up the Start Menu, Search Outlook.
2. Search for Quick Assist
Type Quick Assist in the search bar, then press Enter to open it.

3. Enter the Support Code
Once the Quick Assist window appears, you’ll see a prompt asking for a code. Your IT support engineer will provide this code.
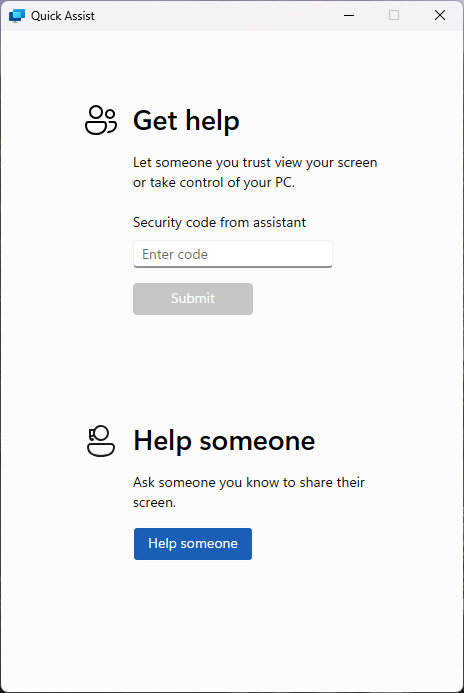
4. Submit the Code
Type in the code and click Submit to initiate the remote session.

5. Accept the Remote Session
Quick Assist will go through a brief loading screen, followed by a prompt with a checkbox. Tick the box and click Accept to confirm the remote session.
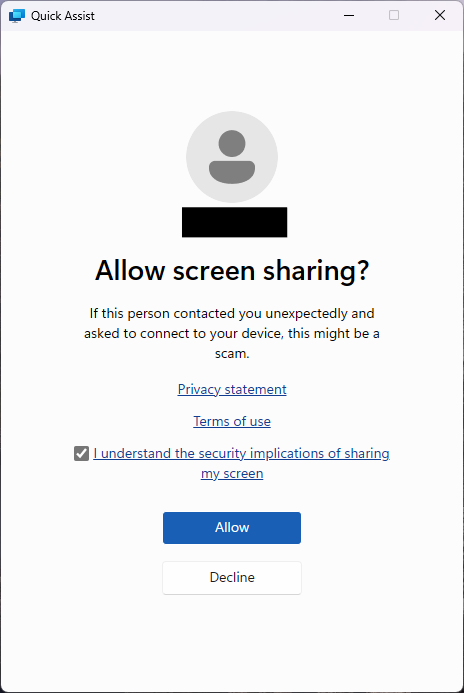
6. Grant Control to the Support Engineer
Finally, your support engineer will request control of your machine. A toolbar will appear at the top of your screen. Click Allow to grant them control.
