How to set up the Microsoft Authenticator app
1. Open the Start Menu
Press
theWindows
keyon
your1. Sign inkeyboard to yourbring workup orthe schoolStart account and then go to your My Account portal.
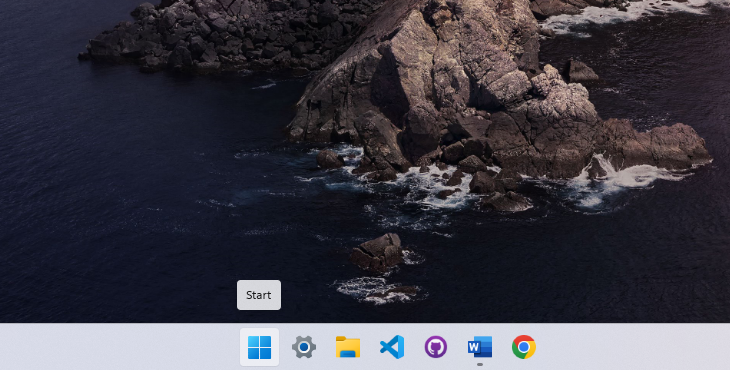
2. Select Security info in the left menu or by using the link in the Security info pane. If you have already registered, you'll be promptedSearch for two-factorQuick verification.Assist
Type AddQuick methodAssist in the search bar, then press Security infoEnter pane.
to open it.

3. OnEnter the AddSupport aCode
Once the list,Quick andAssist thenwindow selectappears, Add.
4. On the Start by getting the app page, select Download now to download and install the Microsoft Authenticator app on your mobile device, and then select Next. For more information about how to download and install the app,you’ll see Download and install the Microsoft Authenticator app.
§ If you want to use an authenticator app other than the Microsoft Authenticator app, select I want to use a different authenticator app.
§ If your organization lets you choose a different method besides the authenticator app, you can select I want to set up a different method.

5. Remain on the Set up your account page while you set up the Microsoft Authenticator app on your mobile device.

6. Open the Microsoft Authenticator app, select to allow notifications (if prompted), select Add account from the Customize and control icon on the upper-right, and then select Work or school account.
Note: The first time you set up the Microsoft Authenticator app, you might receive a prompt asking whether to allow the app to access your camera (iOS) or to allow the app to take pictures and record video (Android). You must select Allow so the authenticator app can access your camera to takefor a picturecode. ofYour theIT QRsupport codeengineer inwill theprovide nextthis step. If you don't allow the camera, you can still set up the authenticator app, but you'll need to add the code information manually. For information about how to add the code manually, see see Manually add an account to the app.code.

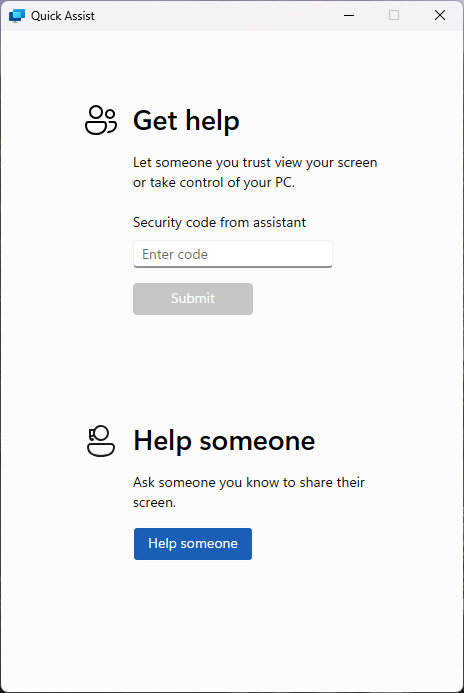
7.
Return4.
toSubmit the Set up your account page on your computer, and then select Next. The Scan the QR code page appears.
8. Scan the provided code with the Microsoft Authenticator app QR code reader, which appeared on your mobile device after you created your work or school accountType in Step 6.
9. The authenticator app should successfully add your work or school account without requiring any additional information from you. However, if the QR code reader can't read the code, you can select Can't scan the QR code and manually enter the code and URLclick intoSubmit to initiate the Microsoftremote Authenticator app. For more information about manually adding a code, see Manually add an account to the app.

10. Select Next on the Scan the QR code page on your computer. A notification is sent to the Microsoft Authenticator app on your mobile device, to test your account.

11. Approve the notification in the Microsoft Authenticator app, and then select Next. Your security info is updated to use the Microsoft Authenticator app by default to verify your identity when using two-step verification or password reset.
session.

5. Accept the Remote Session
Quick Assist will go through a brief loading screen, followed by a prompt with a checkbox. Tick the box and click Accept to confirm the remote session.
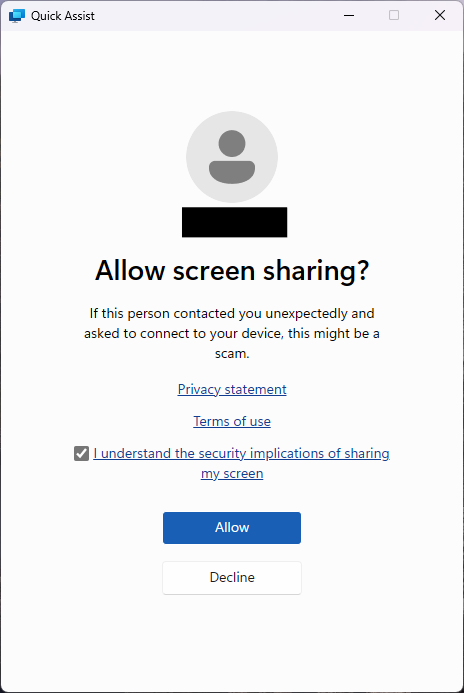
6. Grant Control to the Support Engineer
Finally, your support engineer will request control of your machine. A toolbar will appear at the top of your screen. Click Allow to grant them control.
