# Outlook
Articles relating Outlook Troubleshooting
# Outlook: Adding a Shared Mailbox (Outlook Web App + New Outlook)
**What will be covered:**
- How to open a shared mailbox
- How to set a shared folder / Mailbox
---
### 1. Open Outlook Web App
**Navigate** to the Office 365 portal (https://outlook.office365.com) and log in with your credentials.
[](https://kb.9.technology/uploads/images/gallery/2025-01/jDiViUWCKagSbdtt-image.png)
---
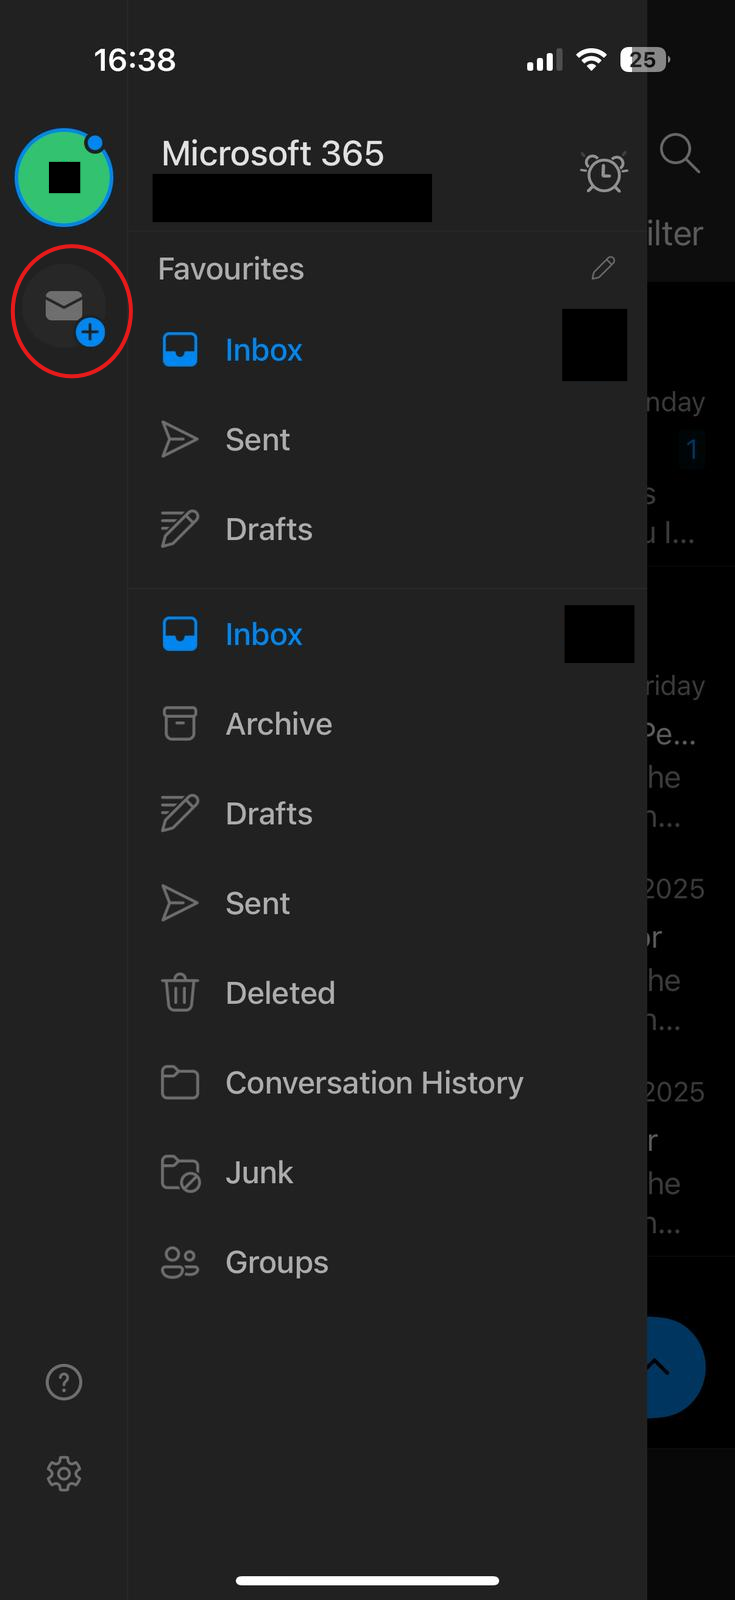
### 2. Open Shared Mailbox
Click on your **profile picture** or **initials** in the top-right corner, Select **Open another mailbox**. Lastly Enter the email address of the shared mailbox and click **Open.** The shared mailbox will open in a new tab.
[](https://kb.9.technology/uploads/images/gallery/2025-01/17IJXyGpU42nLdAL-image.png)
[](https://kb.9.technology/uploads/images/gallery/2025-01/MqtDWjq1YZRitzKr-image.png)
---
### 3. Add Shared Mailbox to Folder List
Right-click **Folders** in the left navigation pane. Right click the **Folders** and Select **Add shared folder.** Enter the email address of the shared mailbox and click **Add**.
[](https://kb.9.technology/uploads/images/gallery/2025-01/dnMwR7VtaXVmSQyu-image.png)
[](https://kb.9.technology/uploads/images/gallery/2025-01/POf9ZfVQcrDLlspA-image.png)
[](https://kb.9.technology/uploads/images/gallery/2025-01/ugTLxPkXCxevNeE0-image.png)
# Outlook: Opening a Mailbox (Outlook Web App + New Outlook)
**What will be covered:**
- How to open a mailbox
---
### 1. Open Outlook Web App
**Navigate** to the Office 365 portal (https://outlook.office365.com) and log in with your credentials.
[](https://kb.9.technology/uploads/images/gallery/2025-01/jDiViUWCKagSbdtt-image.png)
---
### 2. Open Shared Mailbox
Click on your **profile picture** or **initials** in the top-right corner, Select **Open another mailbox**. Lastly Enter the email address of the shared mailbox and click **Open.** The shared mailbox will open in a new tab.
[](https://kb.9.technology/uploads/images/gallery/2025-01/17IJXyGpU42nLdAL-image.png)
[](https://kb.9.technology/uploads/images/gallery/2025-01/MqtDWjq1YZRitzKr-image.png)
# Outlook: How to Add a Shared Mailbox (Classic Outlook)
**What will be covered:**
- How to open a shared mailbox on Classic Outlook
---
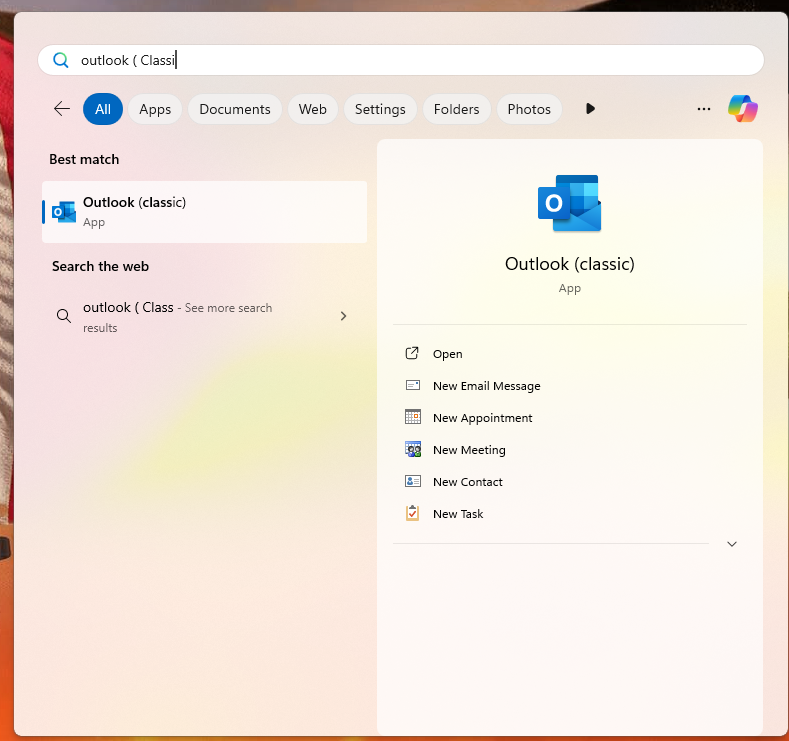
### 1. Open Outlook app (Classic)
Press the **Windows** key on your keyboard to bring up the Start Menu, Search **Outlook**.
[](https://kb.9.technology/uploads/images/gallery/2025-01/TMVJcS64rXaytzxM-image.png)
---
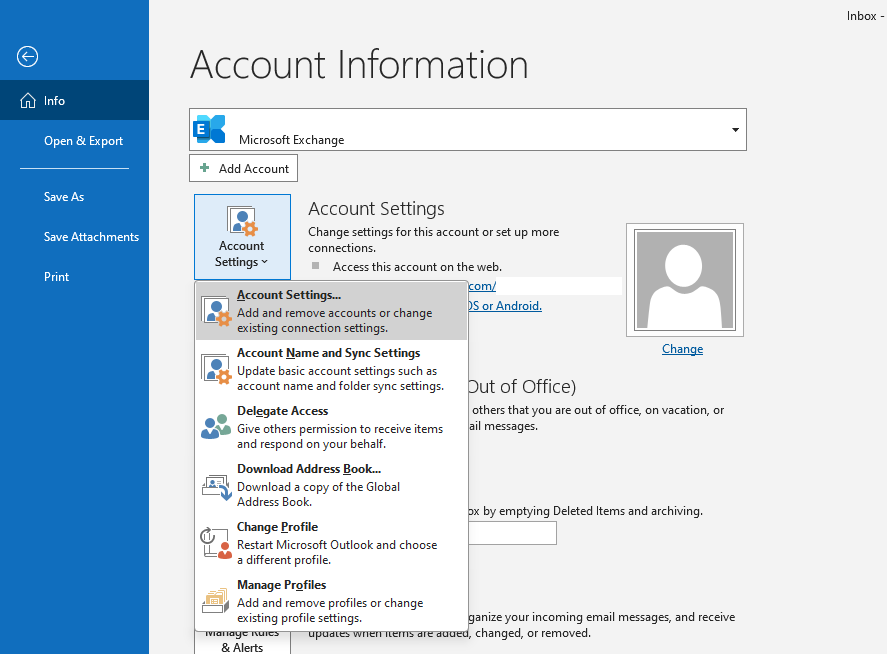
### 2. Outlook Settings
Select the **File** tab on the ribbon (top left), then select **Account Settings** > **Account Settings**.
[](https://kb.9.technology/uploads/images/gallery/2025-01/S4XpowIW3kkHpmgd-image.png)
---
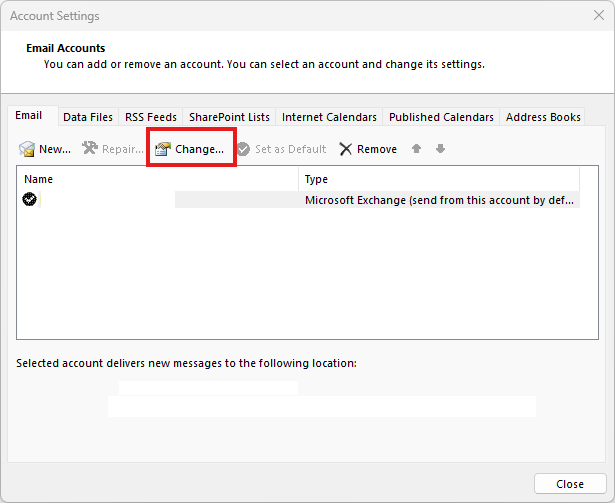
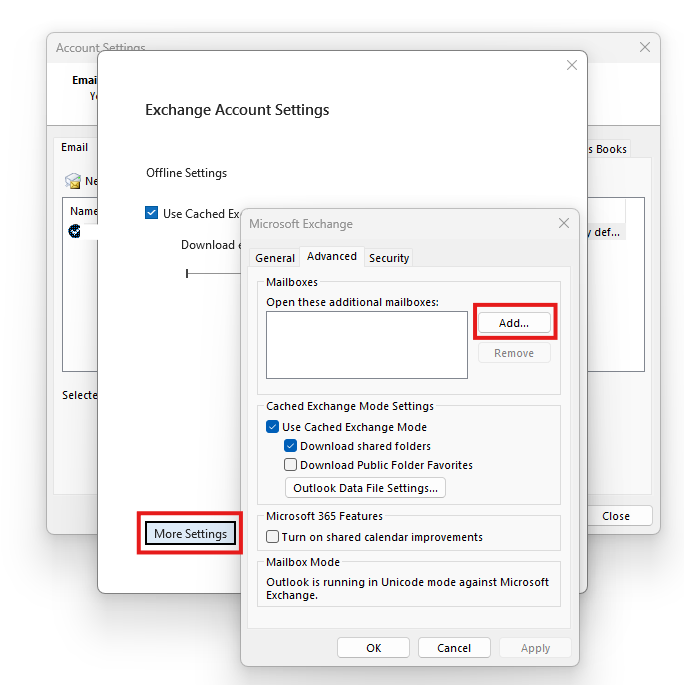
### 3. Account Settings
Select the **Email** tab. Make sure the correct account is highlighted, then choose **Change**. Choose **More Settings** > **Advanced** > **Add**. Type the shared email address, such as . Choose **OK** > **OK**. Choose **Next** > **Finish** > **Close**.
[](https://kb.9.technology/uploads/images/gallery/2025-01/zWYT3yspaO3mS2na-image.png)
[](https://kb.9.technology/uploads/images/gallery/2025-01/v3EuL7QZzAD8T0Kh-image.png)
[](https://kb.9.technology/uploads/images/gallery/2025-01/46ewAepxJOcAu4JN-image.png)
# Outlook: How to Set Up an Email Account on Outlook for Android
Follow these steps to download Outlook on your Android phone and set up your email account.
---
### 1. Download the Outlook App
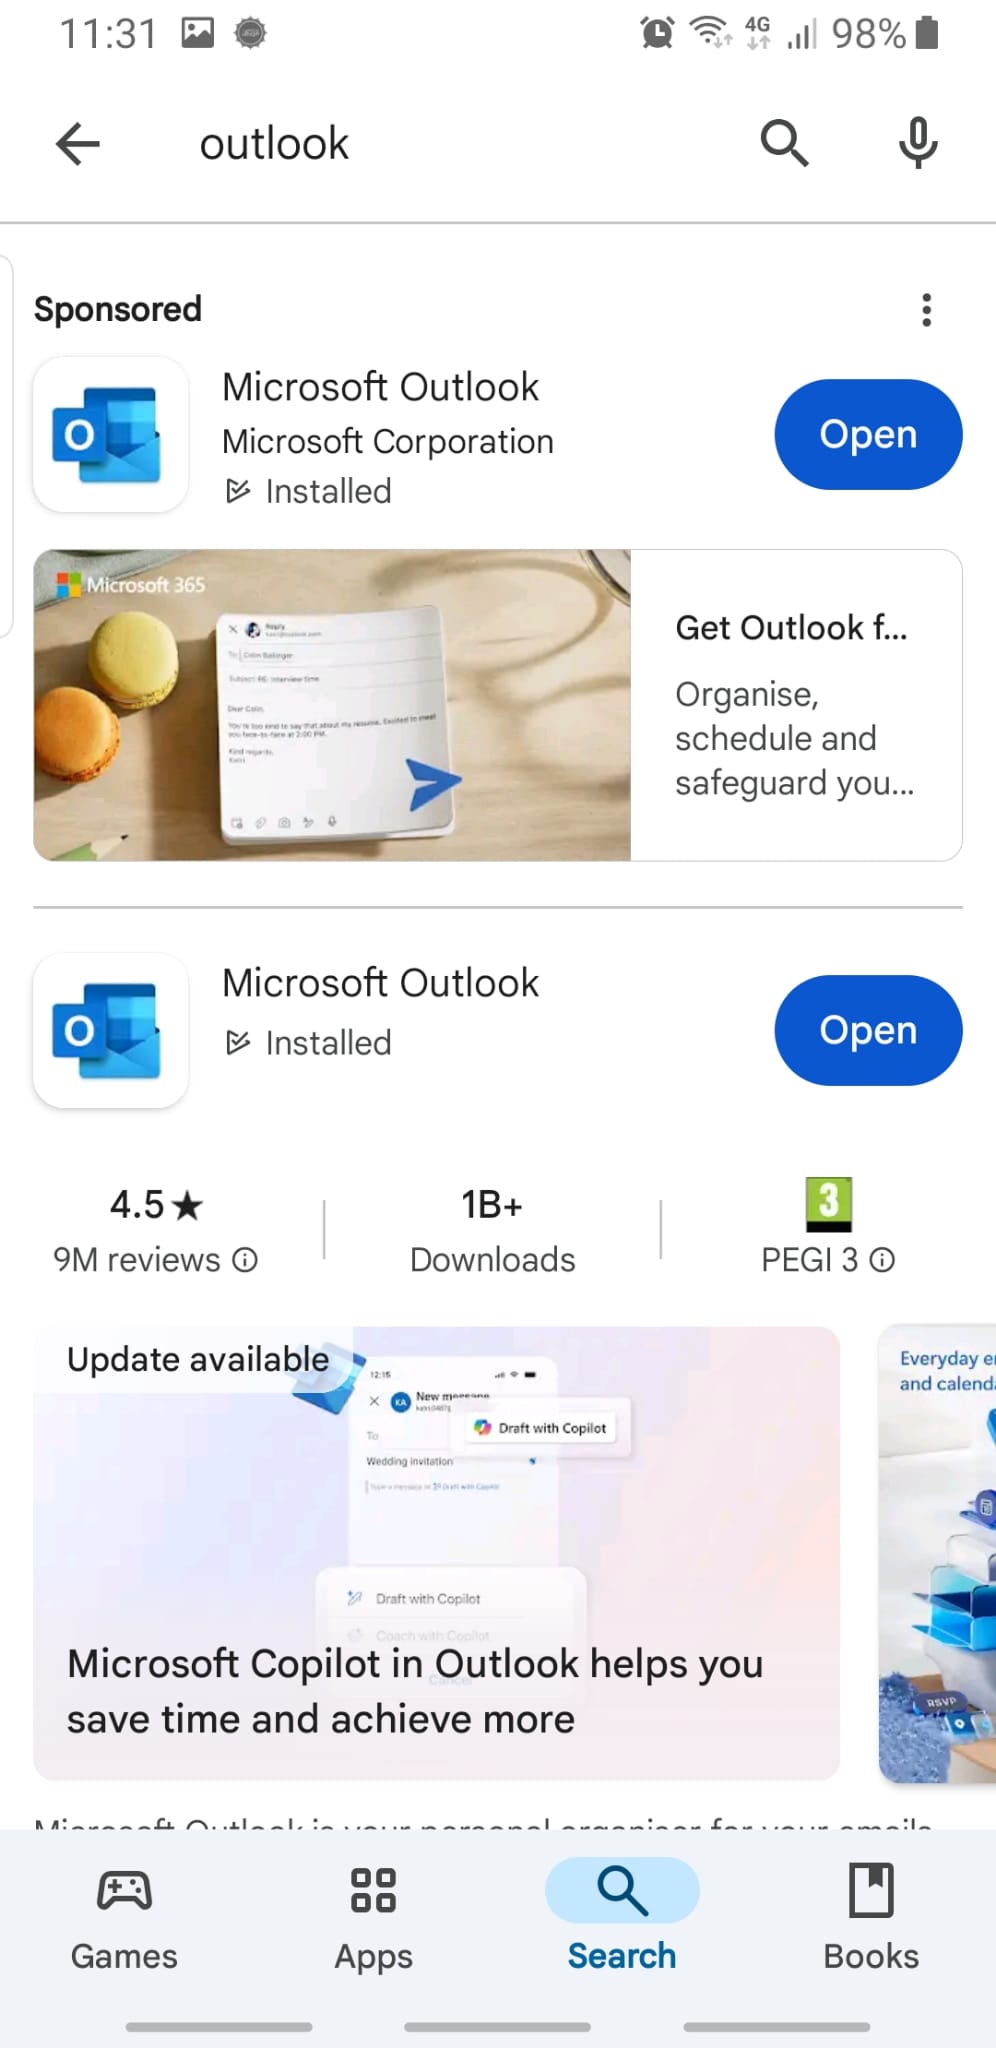
**Instructions**: Open the **Google Play Store** on your Android device.
**Action**: Tap on the **Microsoft Outlook app** and then tap **Install**.
---
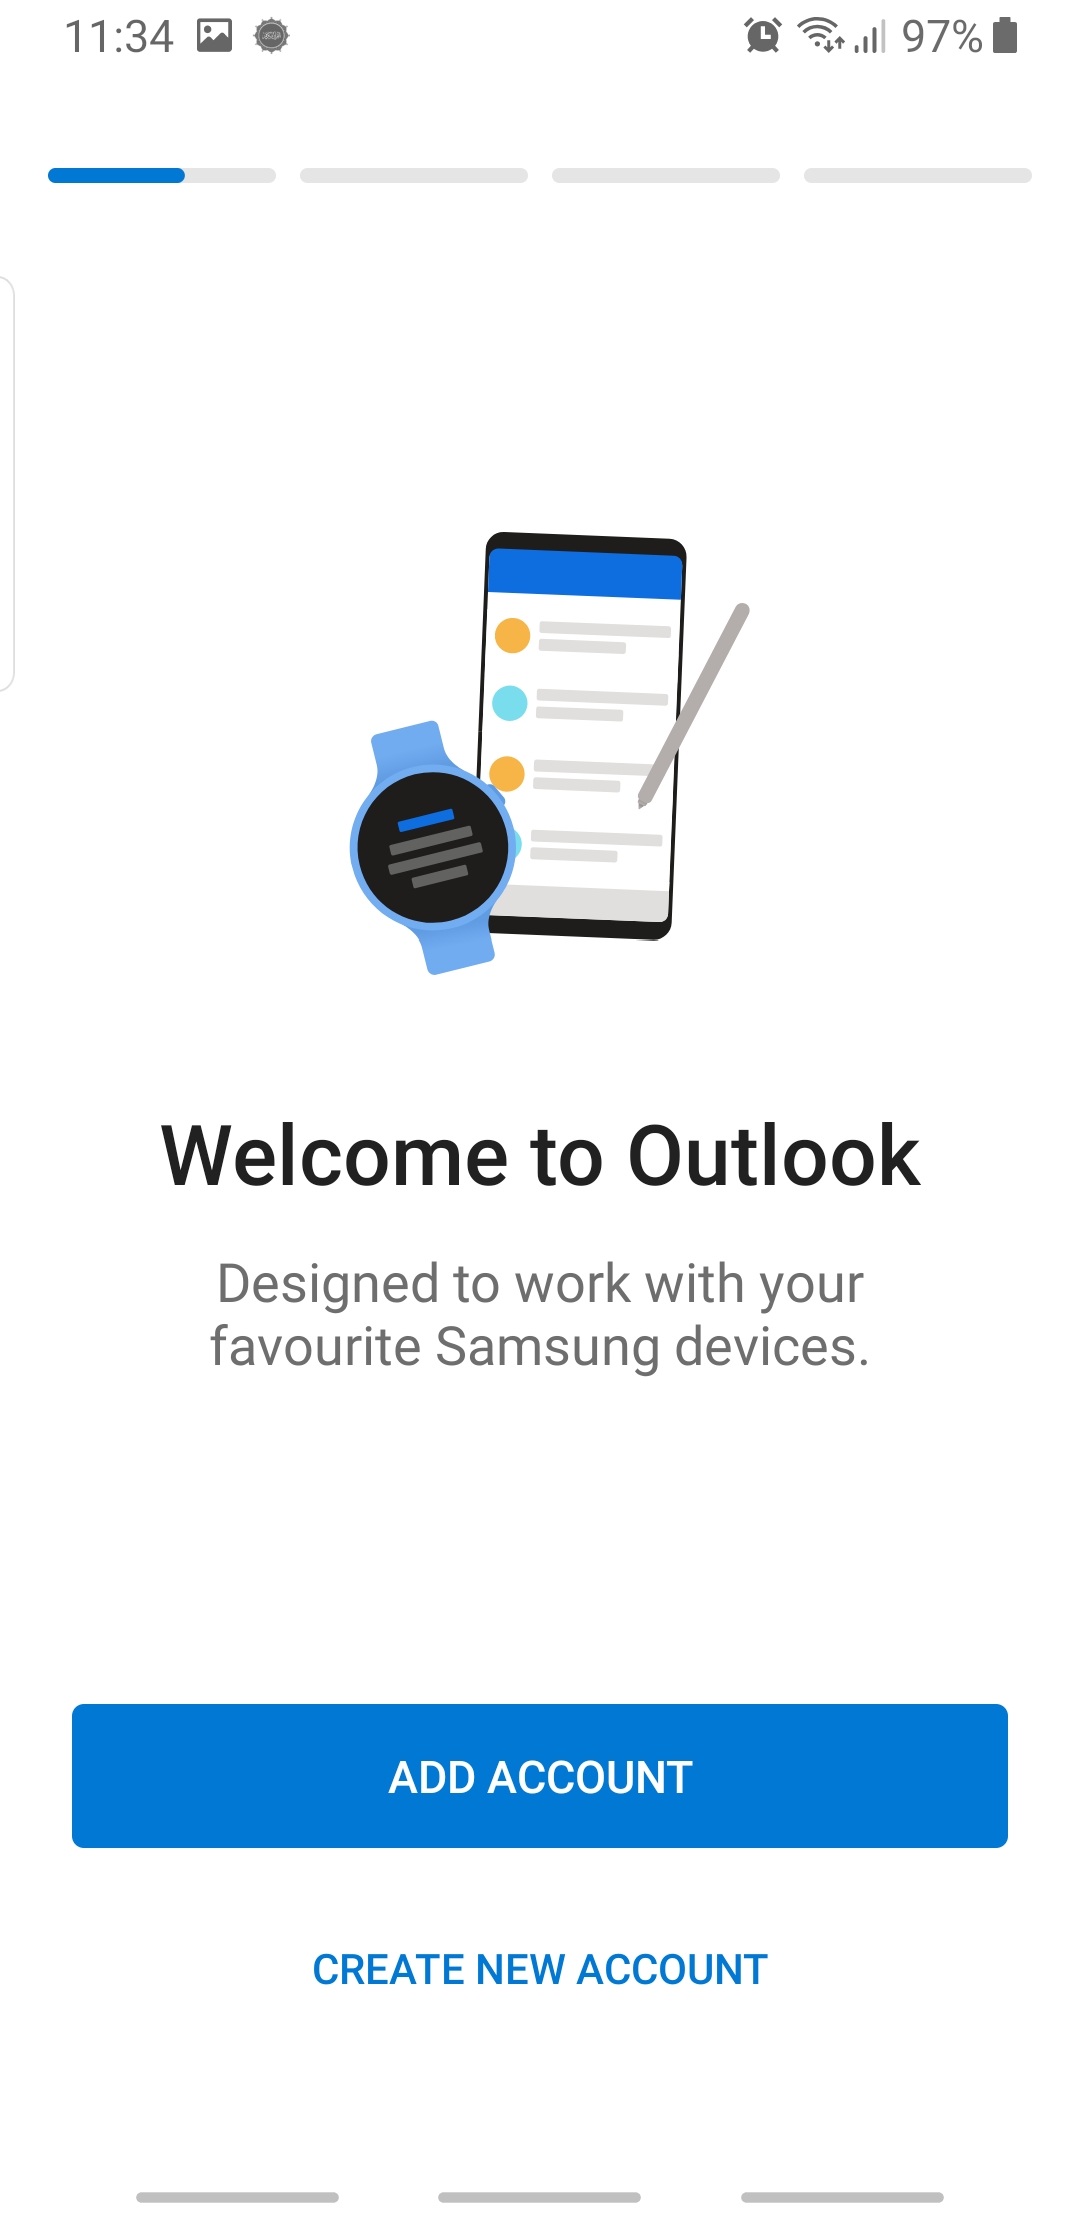
### 2. Open the Outlook App
**Instructions**: Once Outlook is installed, tap **Open** to launch it.
---
### 3. Get Started with Outlook
**Instructions**: When Outlook opens for the first time, tap **Get Started**.
---
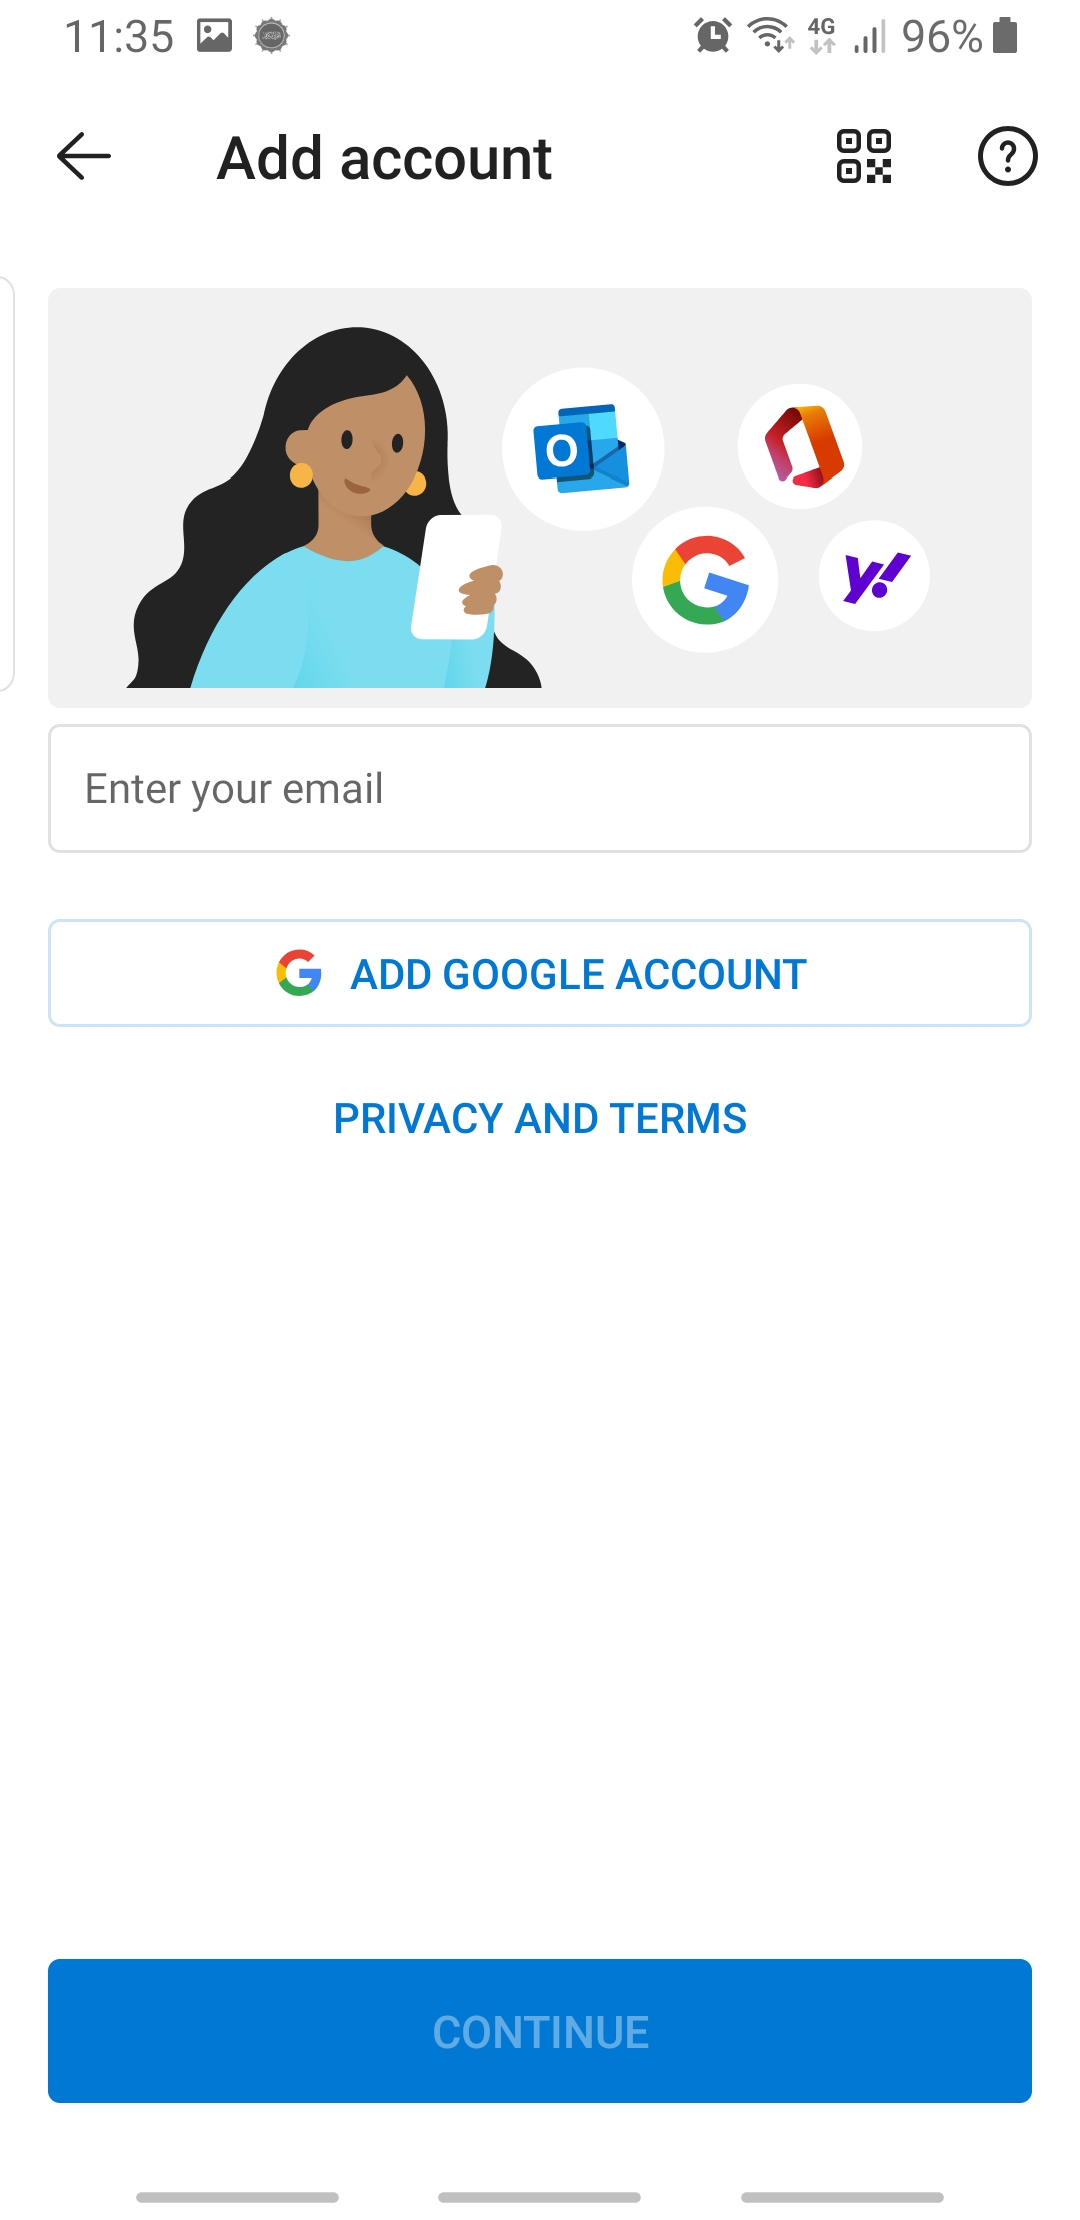
### 4. Add Your Email Address
**Instructions**: Enter your email address in the provided field and tap **Continue**.
---
### 5. Enter Your Password
**Instructions**: You’ll be prompted to enter your email password. Type in your password and tap **Sign In**.
---
### 6. Approve Permissions (if prompted)
**Instructions**: Outlook may ask for permissions to access your contacts, calendar, or files. Tap **Allow** for any permission prompts.
---
### 7. Choose Notification Settings
**Instructions**: You’ll be asked how you want Outlook to notify you. Select **All**, **Focused only**, or **None**, based on your preference.
---
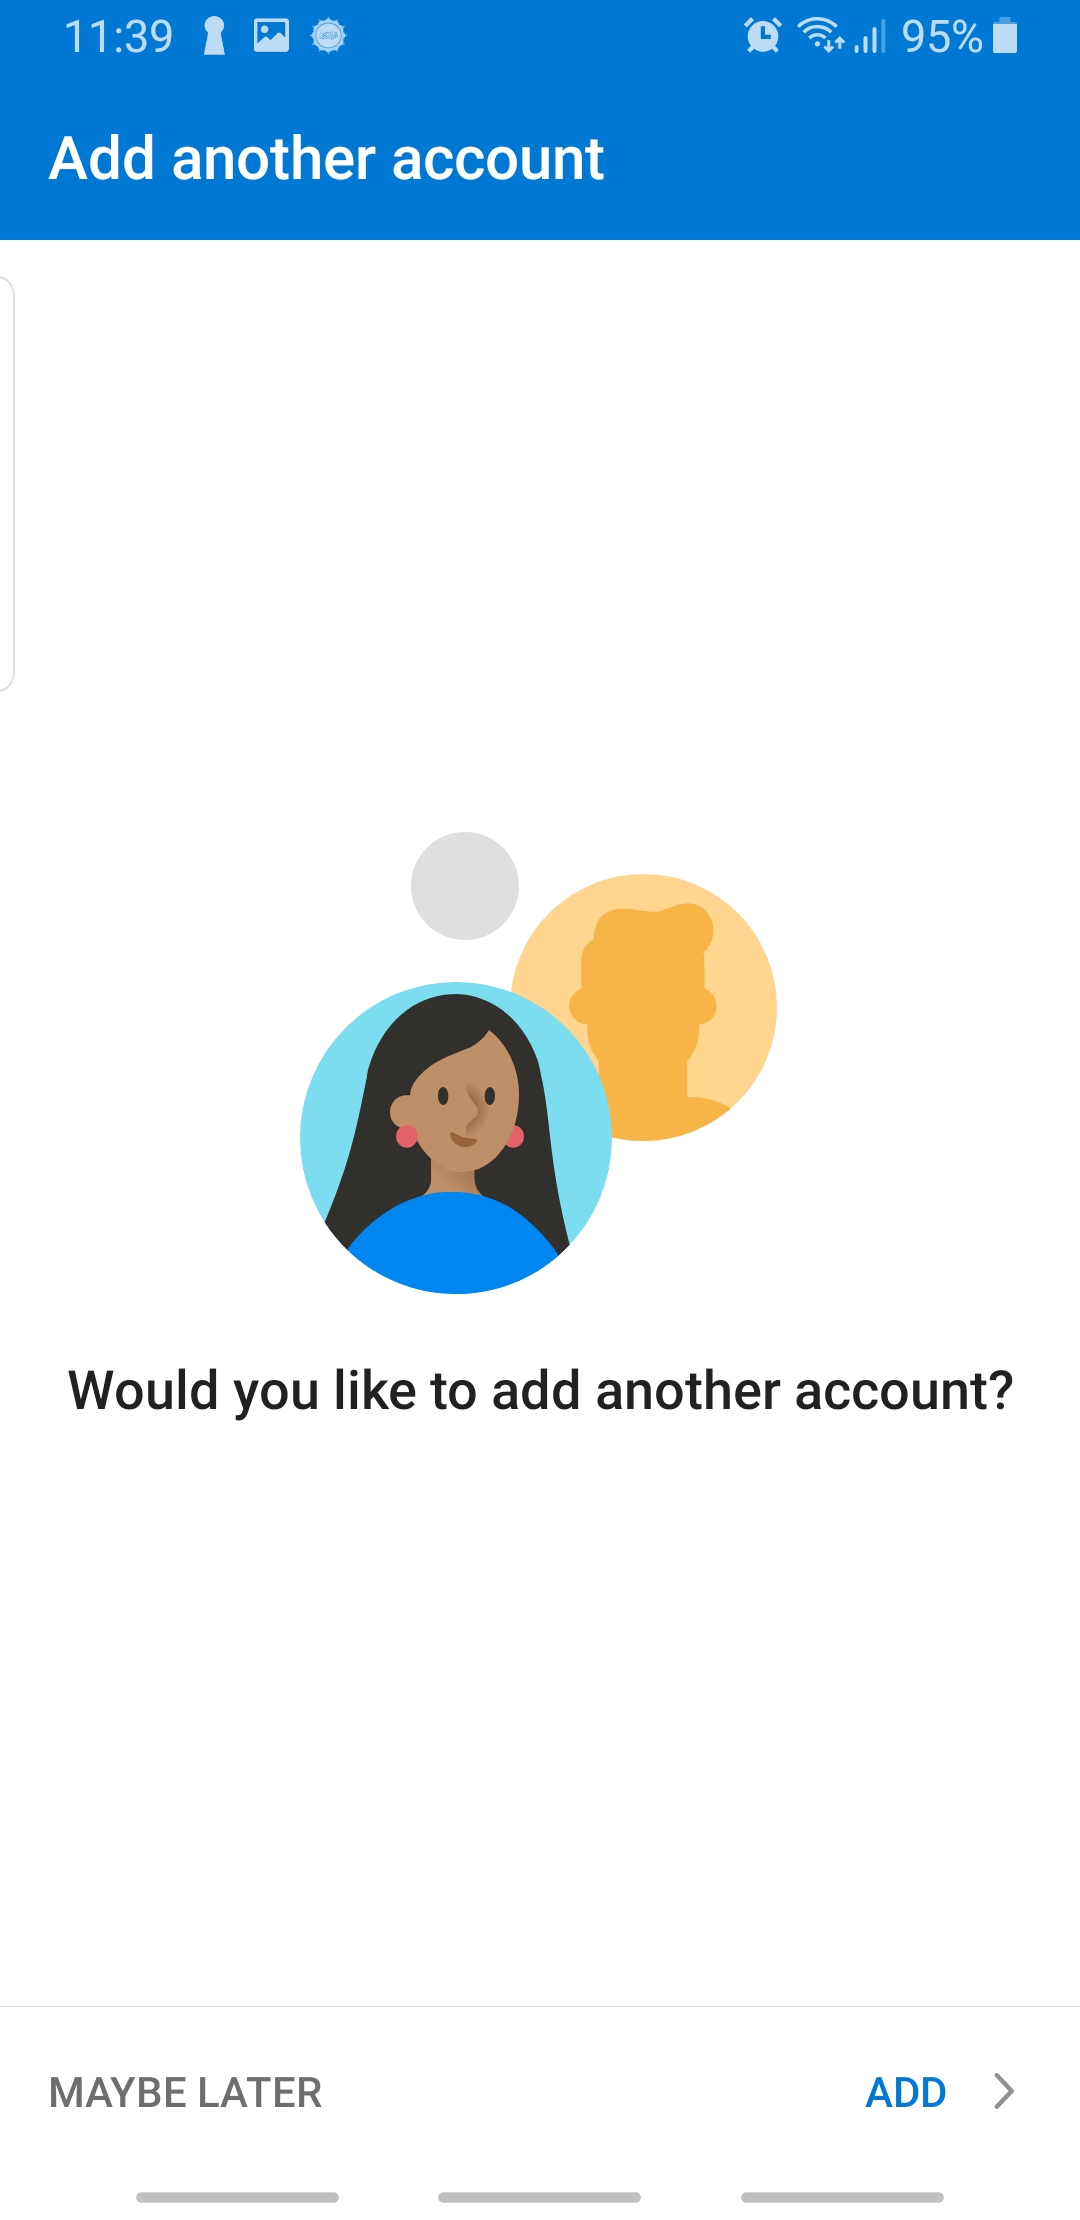
### 8. Finish Setup
**Instructions**: Tap **Skip** or **Continue** to finalize the setup (based on your preferences for additional accounts or tutorial).
---
### 9. Verify Account Setup
**Instructions**: Your inbox should now display. If you see your emails, the setup is complete!
Thanks for reading this Article, if you are still experiencing issues and nothing has been resolved then please contact the support team.
# Outlook: How to encrypt Email Attachments using 7-ZIP
---
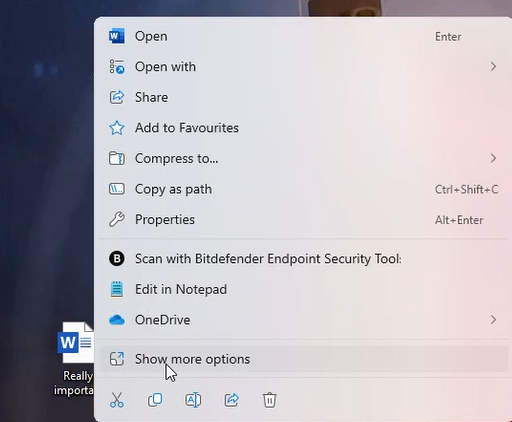
### 1. Right Click document
Find and right click the file you would like to encrypt. After right click find the "**show more options**" button and click it.
[](https://kb.9.technology/uploads/images/gallery/2025-03/NzEyQqMs8vGr8xAR-image.png)
---
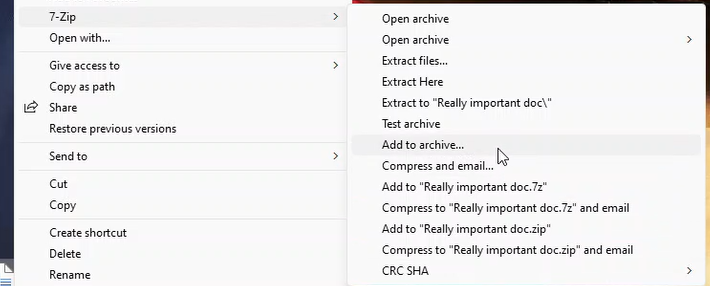
### 2. Add to archive
More options should appear, find the 7-zip option. In the sub-section of 7-zip select add to archive.
[](https://kb.9.technology/uploads/images/gallery/2025-03/ON77H6CuFZ25N2MU-image.png)
---
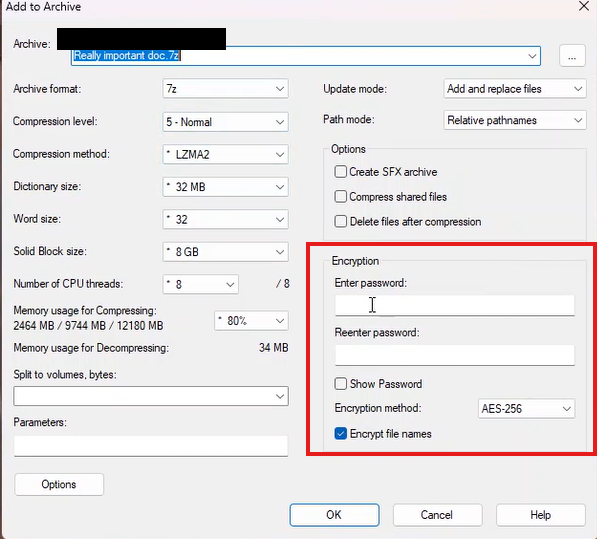
### 3. Enter a password for encrypting
Under the Encryption section, enter a password. This password will be used by the recipient to decrypt the file.
[](https://kb.9.technology/uploads/images/gallery/2026-03/CrKlZPdghtBQhKJ4-image.png)
---
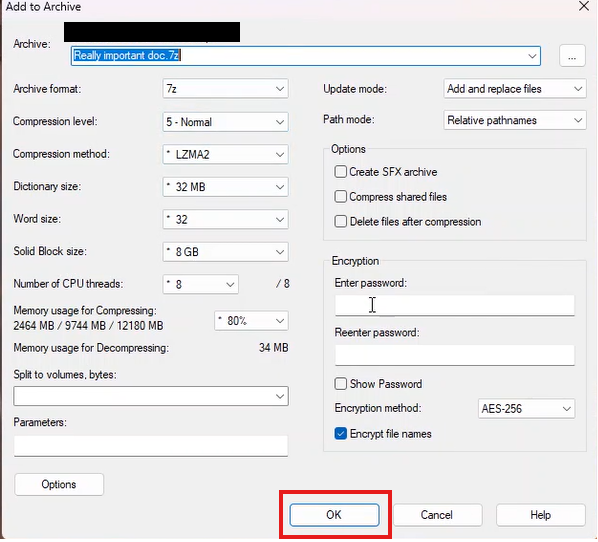
### 4. Click Ok
Click "OK" to finish the encrypting process
[](https://kb.9.technology/uploads/images/gallery/2026-03/LyJD1jFTrjxPwFtk-image.png)
---
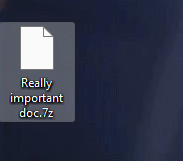
### 5. Transfer file
Finally we got our file encrypted, we can send this file as an attachment via outlook email. Make sure you send the file ending with .7z not the actual unencrypted .docs file. The recipient must also have 7-zip installed to open the file and decrypt.
[](https://kb.9.technology/uploads/images/gallery/2025-03/QyNcyGaLrb9ZeCEt-image.png)
# Outlook: Adding a new Mailbox (iPhone)
---
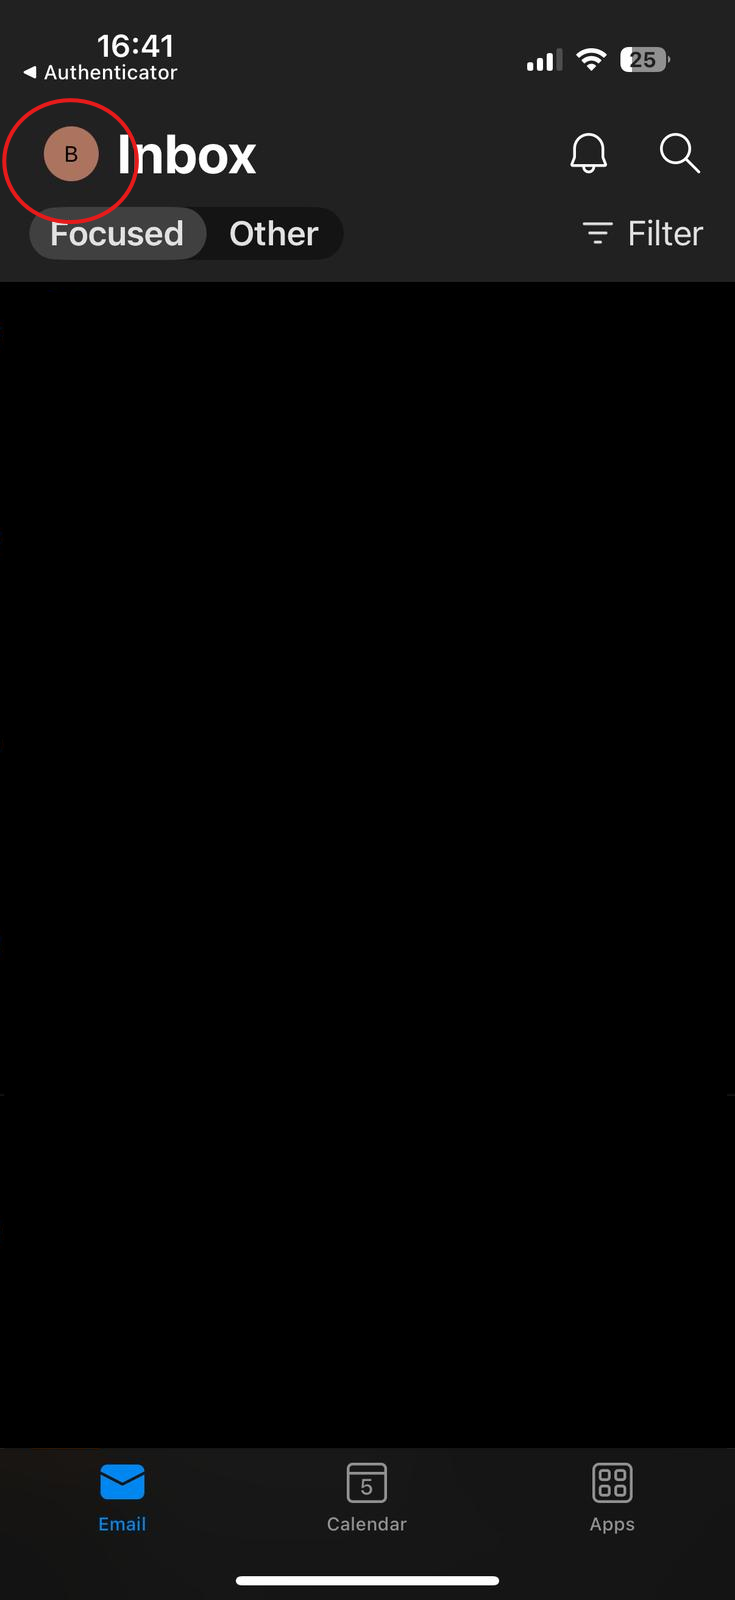
### 1. Open Outlook App
On your iPhone open the outlook app. Click your profile icon top left of the screen.
[](https://kb.9.technology/uploads/images/gallery/2025-03/mLUsN4G0anmGR1Ue-image.png)
---
### 2. Add New Email Account
As highlighted below, click the add email button.
[](https://kb.9.technology/uploads/images/gallery/2025-03/AHLqLF4B4WS0Pn7B-image.png)
###
[](https://kb.9.technology/uploads/images/gallery/2025-03/Gs5v3hpQMOKecD4J-image.png)
---
### 3. Login in
Enter in your email address. It might require MFA if that account has MFA enabled.
[](https://kb.9.technology/uploads/images/gallery/2025-03/340ZPPyubkyrbeIF-image.png)
# Outlook: Signature Images not showing.
---
### 1. Open the Setting menu
Find the **Gear icon,** top right of the screen (near your profile picture).
[](https://kb.9.technology/uploads/images/gallery/2025-03/C1lvA0xHCrJdO3Qa-image.png)
---
### 2. Compose in HTML Format
Go to **Email** > **Compose and reply** > Ensure Compose messages is set to **HTML**.
[](https://kb.9.technology/uploads/images/gallery/2025-03/qkFsu9HJwWKEyMsK-image.png)
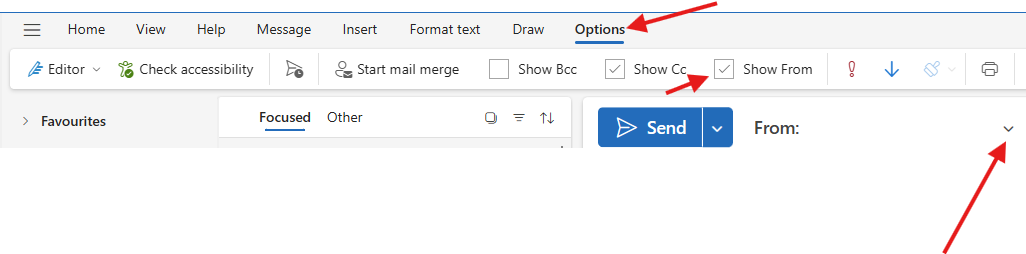
# Outlook: Send from another mailbox
This Quick article goes through enabling the "send from" options on your outlook to enable you to select a mailbox from which the email will be sent by.
---
### 1. Click "New Email"
Click "New email".
---
### 2. Enable "Show From"
1. On the navigation bar, select "Options"
2. Make sure "Show from" is ticked
3. Click the Drop down menu and select the email address you want to send from.
[](https://kb.9.technology/uploads/images/gallery/2025-05/ZG6toRofwcSjBrxD-image.png)
# Outlook: Setting up Out of Office Message (Classical Outlook)
**Quick guide about setting up out of office reply on classical outlook.**
---
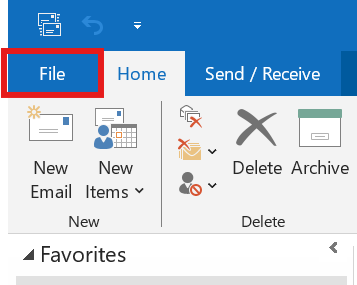
### 1. Open File's Tab
Click the **file** tab.
[](https://kb.9.technology/uploads/images/gallery/2025-06/af5yZPQDj3VL3Dne-image.png)
---
### 2. Select Automatic replies
In the **Info Section**, find the automatic replies and open it.
[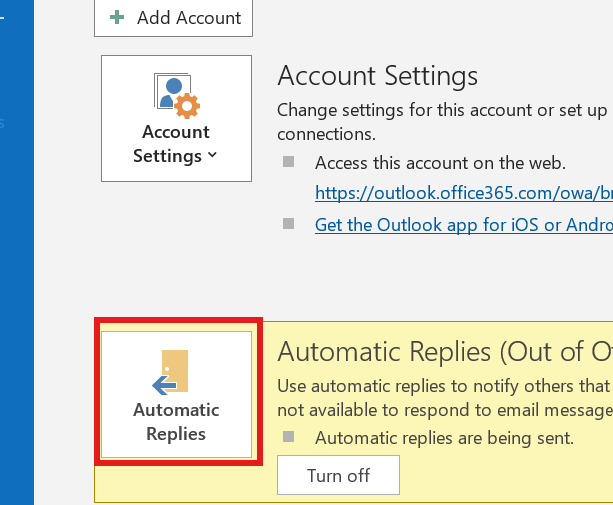](https://kb.9.technology/uploads/images/gallery/2025-06/IywXETDGuKfcUxkq-image.png)
---
### 3. Configure your reply
In here you can configure the automatic reply you want to be sent to insiders and outsiders.
[](https://kb.9.technology/uploads/images/gallery/2025-06/8ujrwyGLg00V8azx-image.png)
---
### 4. Things you might consider
You might want to consider the following when configuring:
1. Adding your signature at the bottom on the reply. ( Simply copy and paste your current signature)
2. Setting an Outside my Organization reply
3. Sending a message between a particular time period. (check the 'only send during this time range' box)#
4. Adding rules if you want the reply to be more targeted.
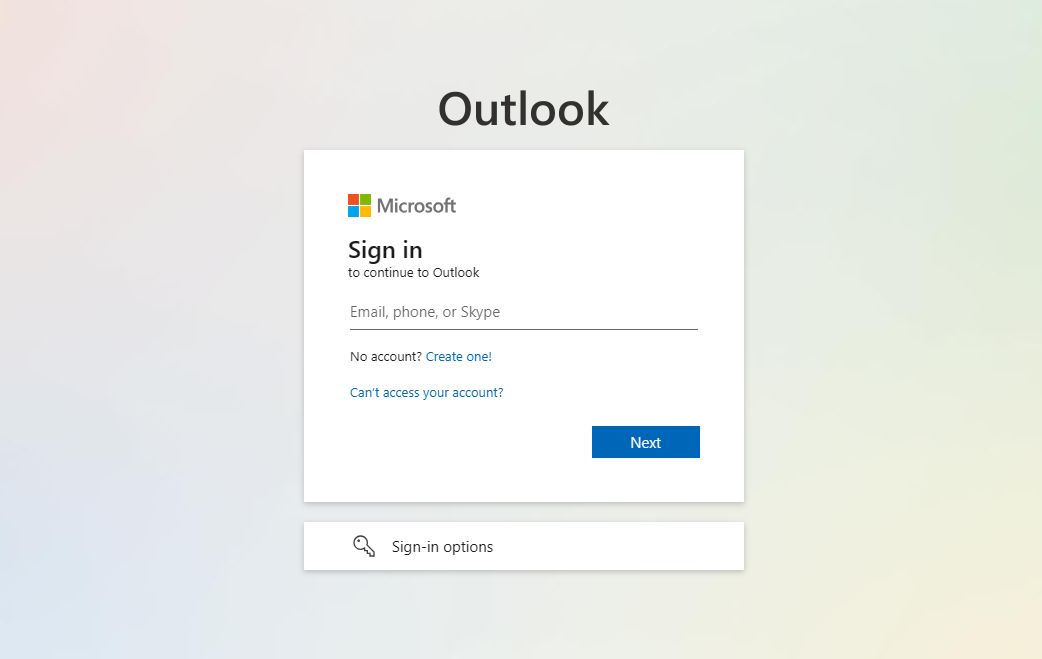
# Outlook | Logging into Outlook
---
### 1. Open a web browser and type "office.com" in the search bar.
[](https://kb.9.technology/uploads/images/gallery/2026-02/proHcPbWWxew20T2-image.png)
---
### 2. Click the **"Sign in"** Icon top right
[](https://kb.9.technology/uploads/images/gallery/2026-02/nfD8vqYD41WgNiGt-image.png)
---
### 3. Login with the email credentials we have provided.
[](https://kb.9.technology/uploads/images/gallery/2026-02/RXJnBI2SasfVcOav-image.png)
---
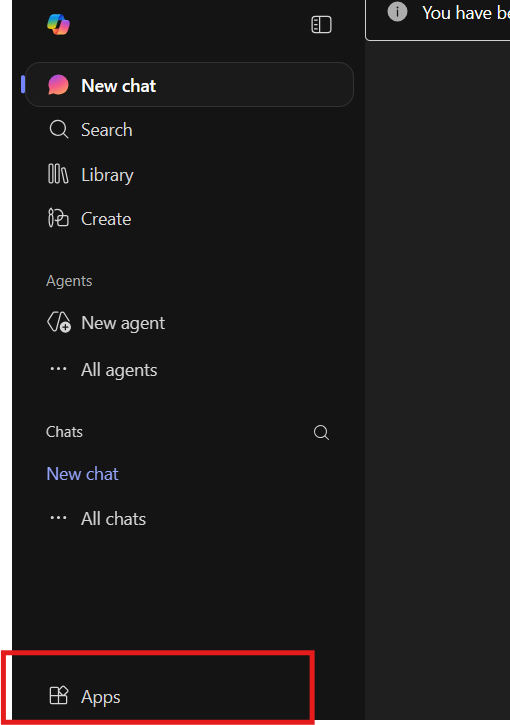
### 4. On the bottom left, click on apps and select Outlook
[](https://kb.9.technology/uploads/images/gallery/2026-02/L5u7qKLoVIbwYDpN-image.png)