3CX IP Phone
Pages relating 3CX Phones
- 3CX: Configuring Ports on Your 3CX Server Using nftables
- 3CX: Setting Up 3CX on Mobile
- 3CX: How to view Recordings & Voicemails
3CX: Configuring Ports on Your 3CX Server Using nftables
Step 1: Login to Your Server
First, you'll need to access your server via SSH.
ssh username@your_server_ip
Step 2: Open the nftables Configuration File
Once you're logged into your server, the next step is to edit the nftables configuration file. Run the following command to open the file in the vim editor:
vim /etc/nftables.conf
Step 3: Add Your Desired Port
In the vim editor, add the rule for your desired port. For example, to open port 8080 for TCP traffic, you would add the following line:
tcp dport 8080 accept
Or if you want to add multiple ports for TCP/UDP, you should add the following line:
tcp dport {8080,8443} accept

udp dport {7000,150} accept
Ensure you place this line in the correct section of the configuration file, typically within the table and chain definitions for your firewall rules.
Step 4: Save the Configuration File
After adding your port rule, you need to save and close the vim editor. To do this, follow these steps:
- Press
Escto exit insert mode. - Type
:wqand pressEnterto write the changes and quit the editor.
Step 5: Backup the Configuration File
Before applying the new configuration, it's a good practice to create a backup of the current configuration file. This ensures you can easily revert to the previous settings if something goes wrong. Run the following command to create a backup:
cp /etc/nftables.conf /etc/nftables.conf-BAK
Step 6: Apply the New Configuration
Finally, apply the new nftables configuration by running the following command:
sudo nft -f /etc/nftables.conf
This command loads the rules from the configuration file and applies them to your firewall.
3CX: Setting Up 3CX on Mobile
What will be covered:
- How to set up the 3CX soft phone on your phone.
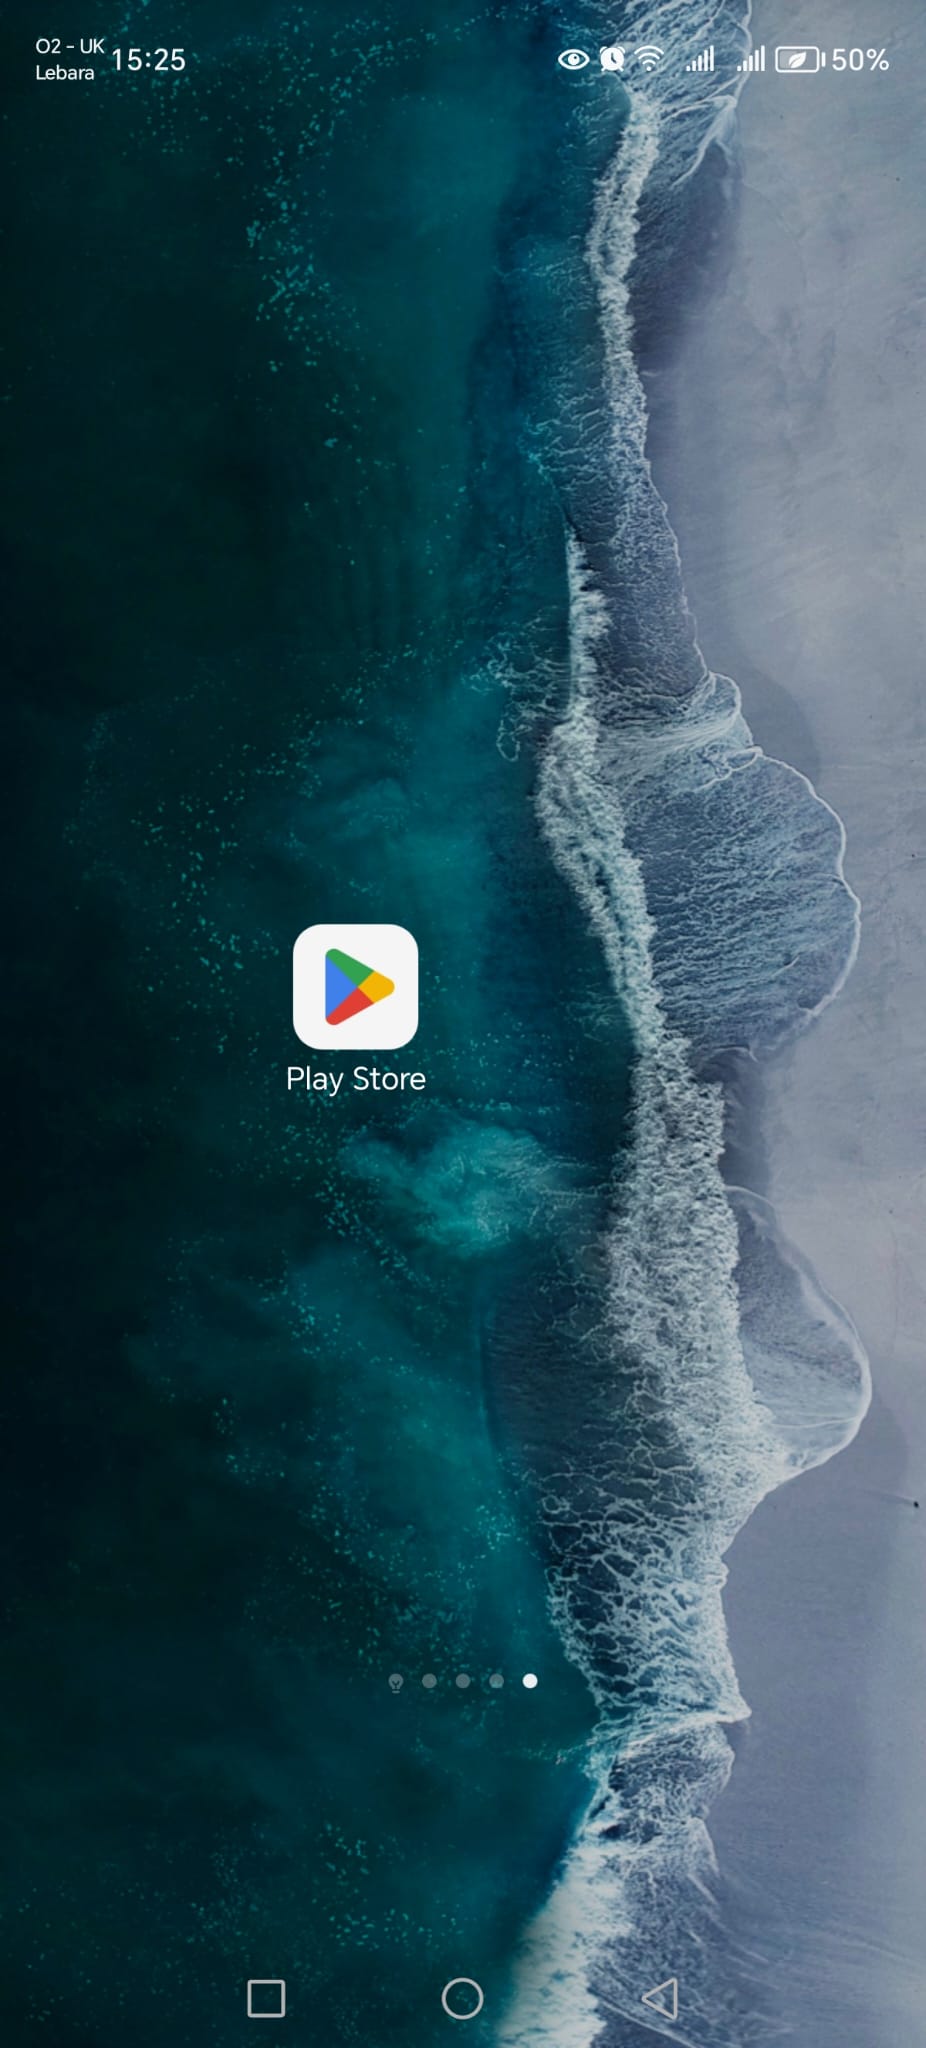
1. Open Google Store /Apple Store
Open the google store or Apple store and search 3CX.
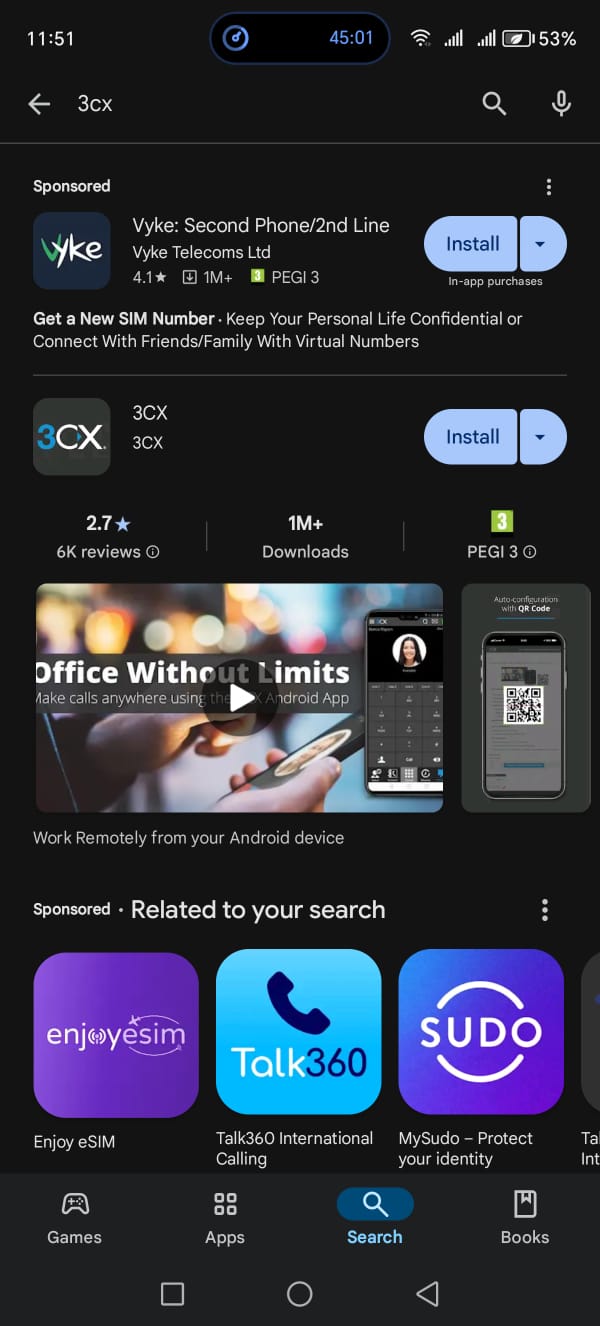
2. Search & install 3CX
Click install or download on the 3CX App.
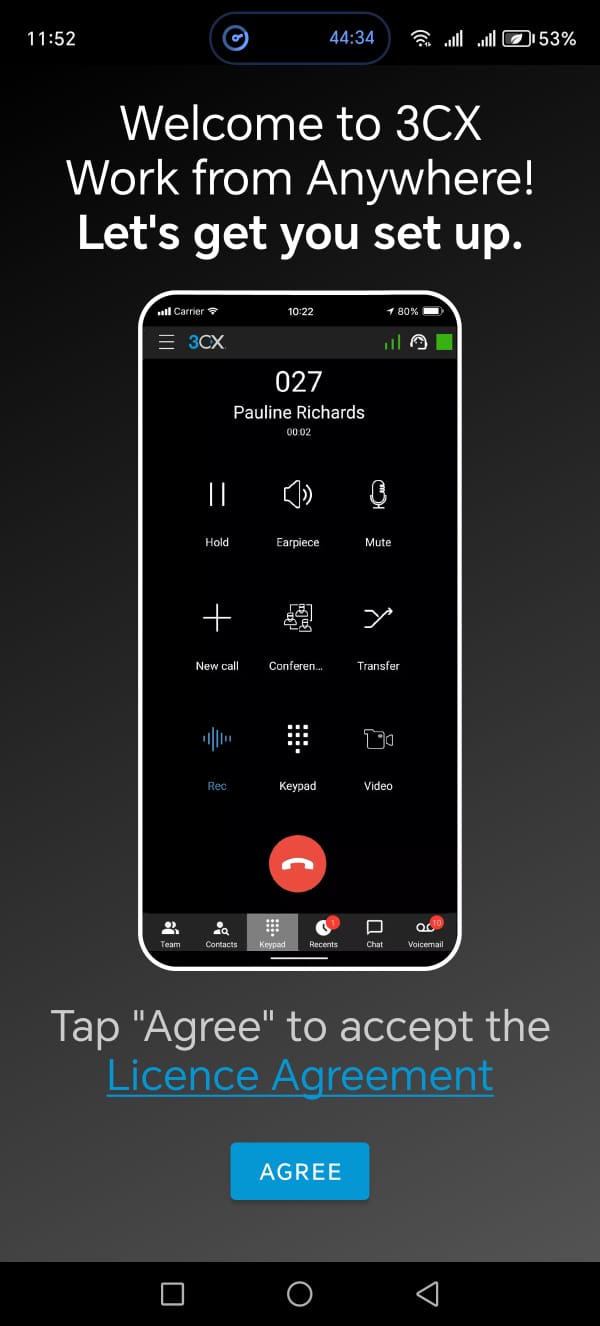
3. Open 3CX Mobile Application
Open the app and click agree on Welcoming screen
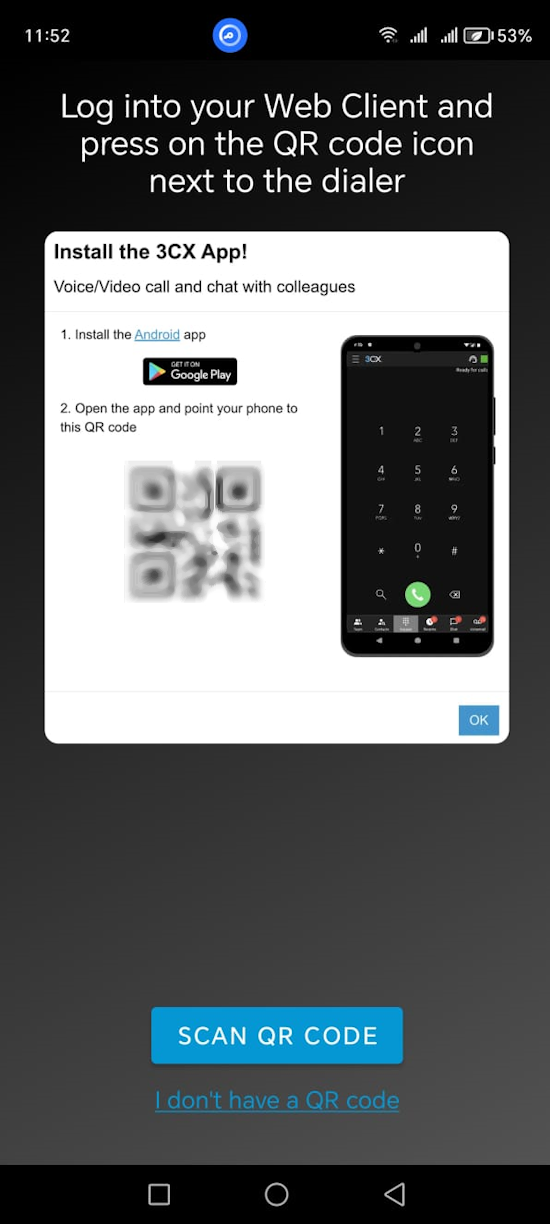
4. Scan QR Code
The QR code is found in your 3CX web client, Alternatively if you are unable to access the web client, contact IT support for the your 3CX QR code.
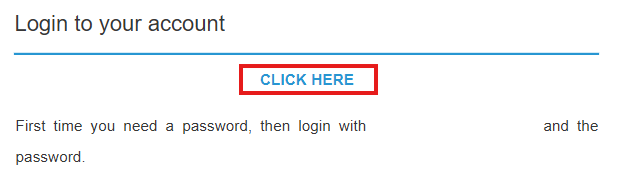
5. Check your Inbox
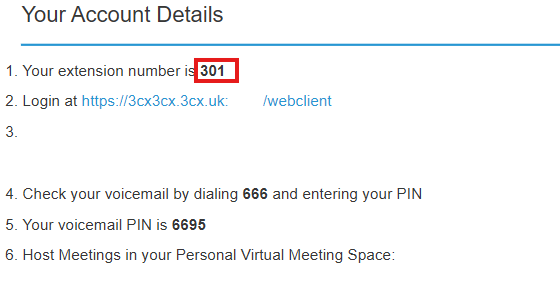
A "Welcome to 3CX" email should have been sent to your email address. Check your inbox for this email. This email contains your extension number and the link to the 3CX Web client - "Click Here" link. Make note of your extension number.
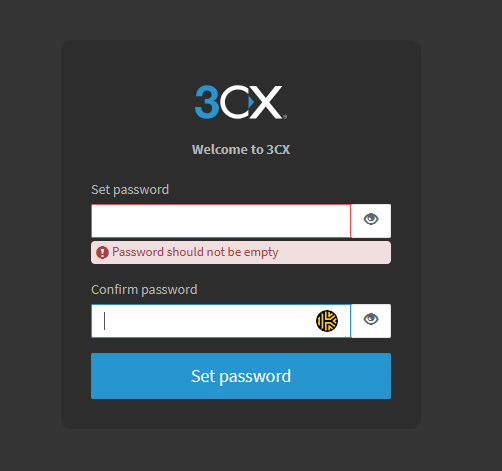
6. Create a new password
You will be prompted to enter a new password if you have not already used the 3CX Web Client before.
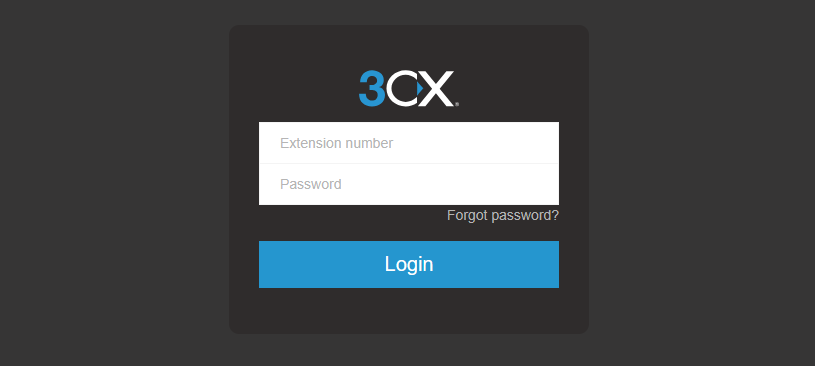
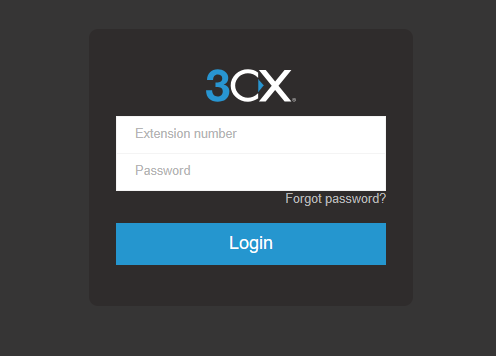
6. Login to 3CX Web Client
Enter you extension number and you password.
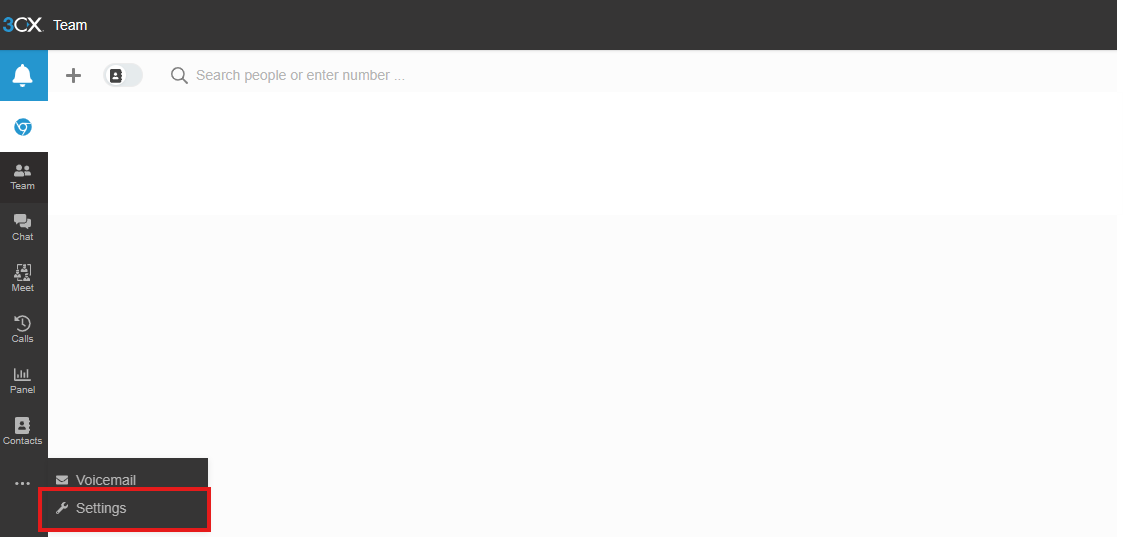
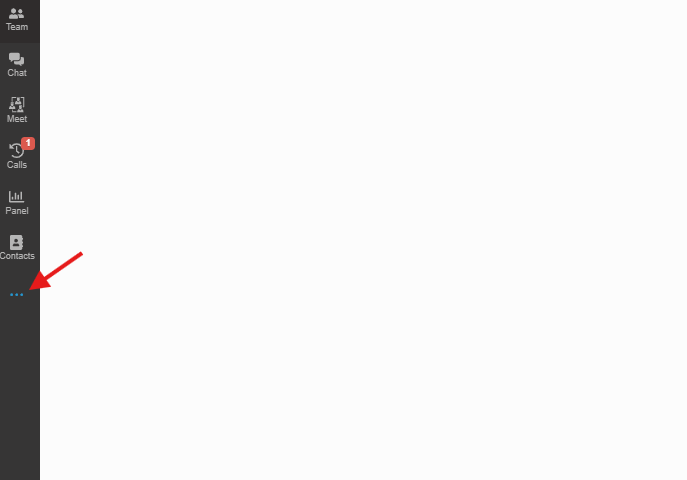
6. Go to the Settings
On the left side click the "..." > Settings.
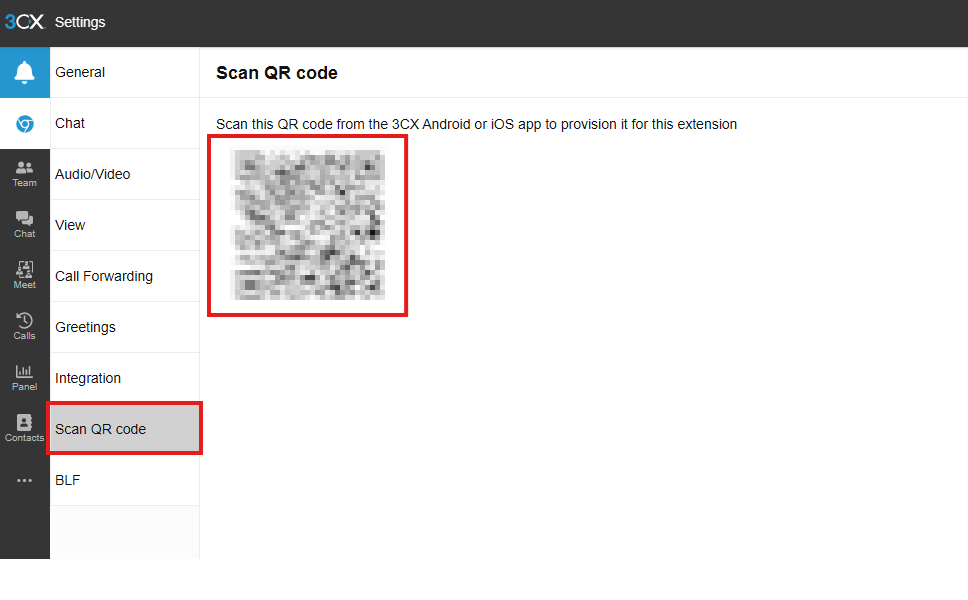
6. Locate Scan QR Code page
Click the scan QR code, the QR Should appear. Use your phone alongside the 3cx Mobile app to scan the code.
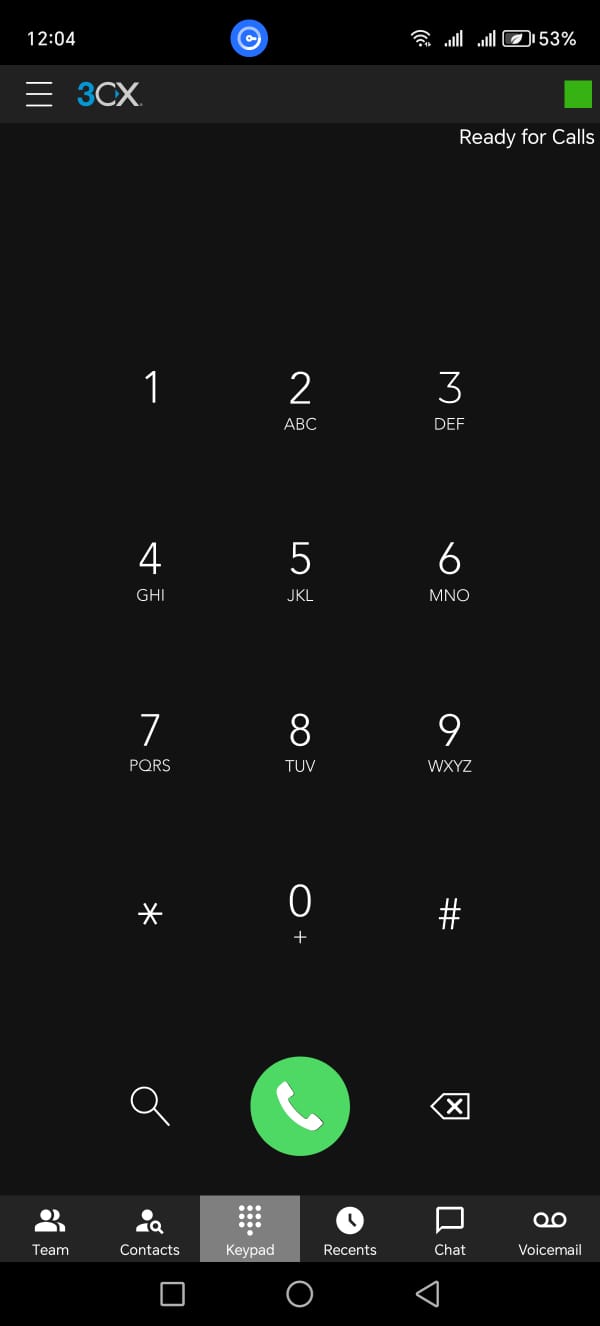
6. 3CX Soft Phone
Finally you should be presented with your 3CX Soft Phone.
3CX: How to view Recordings & Voicemails
Article shows the steps of viewing recordings and voicemails within the 3CX web app
1. Open the 3CX Web app
Enter your extension number and password
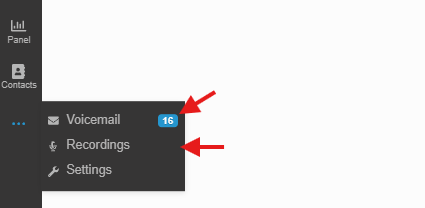
2. Three dots
Click and Open the dots menu
3. Review Recordings and Voicemail
Pick and choose whether you want to look at recordings or voicemails.